
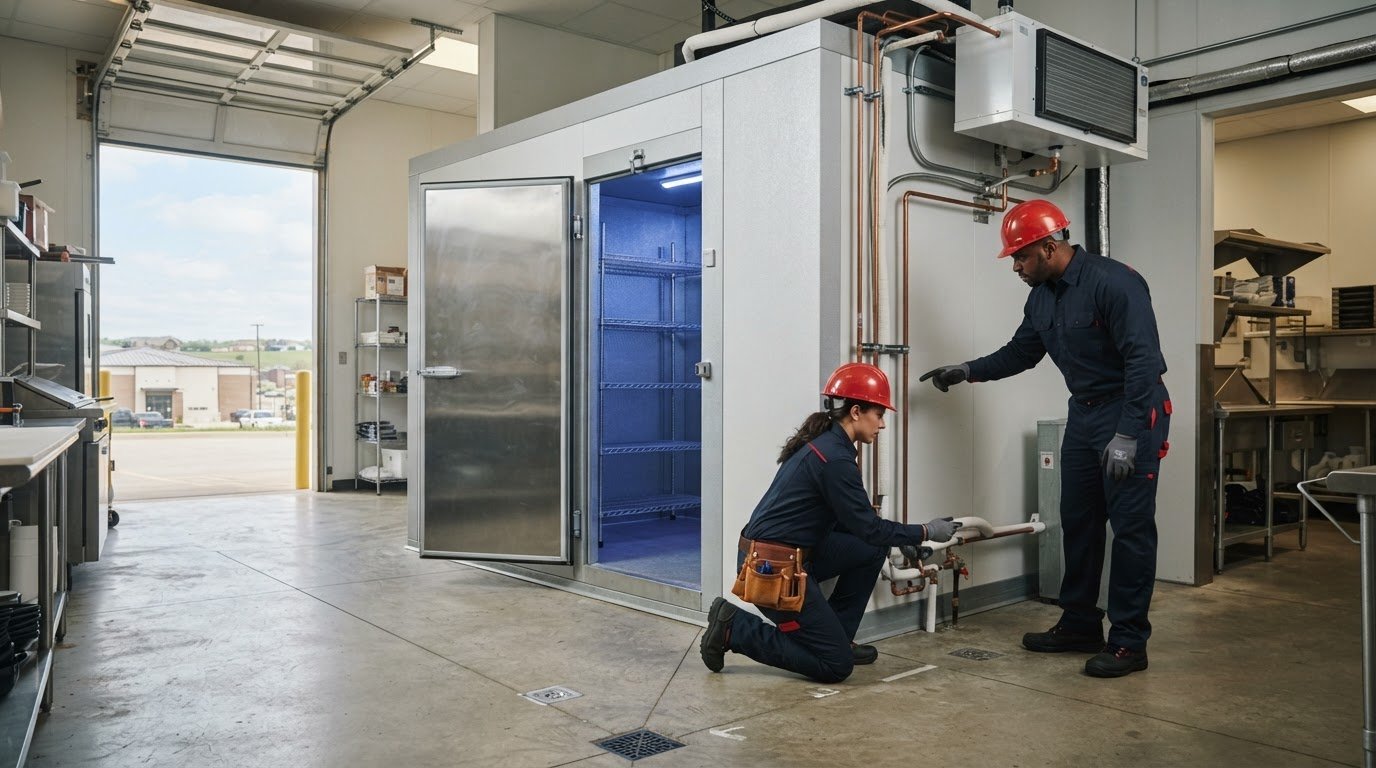
A standard walk-in cooler installation in Lee’s Summit typically takes 1-3 days; a custom-built unit may take 1-2 weeks, depending on complexity. The schedule and installation cost depend on the cooler’s configuration and the work the site requires.
Planning a new walk-in cooler installation in Lee’s Summit involves more than choosing dimensions. The installation area, flooring, access, refrigeration setup, and utility connections all shape the project. Organizing these details early helps you prepare the space and plan around the work.
This guide covers the main factors that affect installation scope, including cooler configuration, floor type, and site conditions. It also explains level surfaces, insulated flooring and vapor barriers, and the key stages from site preparation to startup. You’ll know what to consider before adding a walk-in cooler to a restaurant, warehouse, or other commercial operation.
Key Takeaways
- Plan the installation area around a level surface, suitable flooring, and the cooler’s configuration.
- Understand how dimensions, refrigeration type, site access, utilities, and permit needs can affect the project quote.
- Prepare for the installation sequence by coordinating site readiness and required utility work.
- Learn which operating signs can point to refrigeration issues and when routine maintenance can help.
- Consider how the indoor location and condenser heat may affect the building’s cooling needs.
Site preparation, floors, and vapor barriers
Prepare the installation area before the walk-in panels and refrigeration equipment arrive. A site review should cover the floor, access route, utilities, and airflow around the condenser.
Site Assessment and Leveling
Commercial walk-ins can be configured as coolers or freezers, with dimensions and compartment counts chosen to suit storage needs and available space. Before installation, assess the planned footprint, floor condition, and route for moving equipment into place. The area must be level so panels align properly. Permit requirements depend on the work: plumbing permits apply when drainage or water lines are involved, while building permits are usually required for structural changes.
Access and Ventilation
Measure the route from the receiving entrance to the installation area, including doorways, turns, and overhead obstructions. A clear path helps installers position panels and refrigeration components without disrupting nearby work areas. For an indoor location, consider whether the building’s HVAC system can manage heat from the condenser. Keep stored materials clear of equipment so airflow and service access are not restricted.
Floor design depends on the walk-in configuration and the condition of the existing surface. Some installations use a level pad with insulated floor panels. A floorless walk-in may instead need a level, insulated base or screed. The right arrangement helps the enclosure sit evenly and supports its intended use. Include floor height and transitions in the site review, especially where carts or other equipment move between the cooler and adjacent areas.
- Check the floor for uneven areas, damage, and changes in elevation.
- Confirm whether the design calls for insulated floor panels or a floorless base.
- Review the planned vapor barrier and insulation requirements for the selected box.
- Keep the full installation footprint clear of stored goods and debris.
A vapor barrier may be required depending on the walk-in design. Insulated floor panels or a prepared screed may also be needed, particularly for a floorless unit. Include these details in the site plan rather than treating the floor as a separate finishing task. The surface and enclosure need to work together to support proper alignment and the refrigeration setup.
Drainage needs depend on the refrigeration system. A remote system requires a drain to carry away water from evaporator defrost. Some self-contained systems dissipate moisture internally and do not require a drain. Identify the system type and planned drain route before work begins so the floor layout and utility path do not conflict.
The U.S. Environmental Protection Agency states that walk-in installations should comply with applicable state and local building codes and standards. A designated site contact can coordinate access, clear the work area, and keep preparation on track before installation.
Factors affecting installation cost
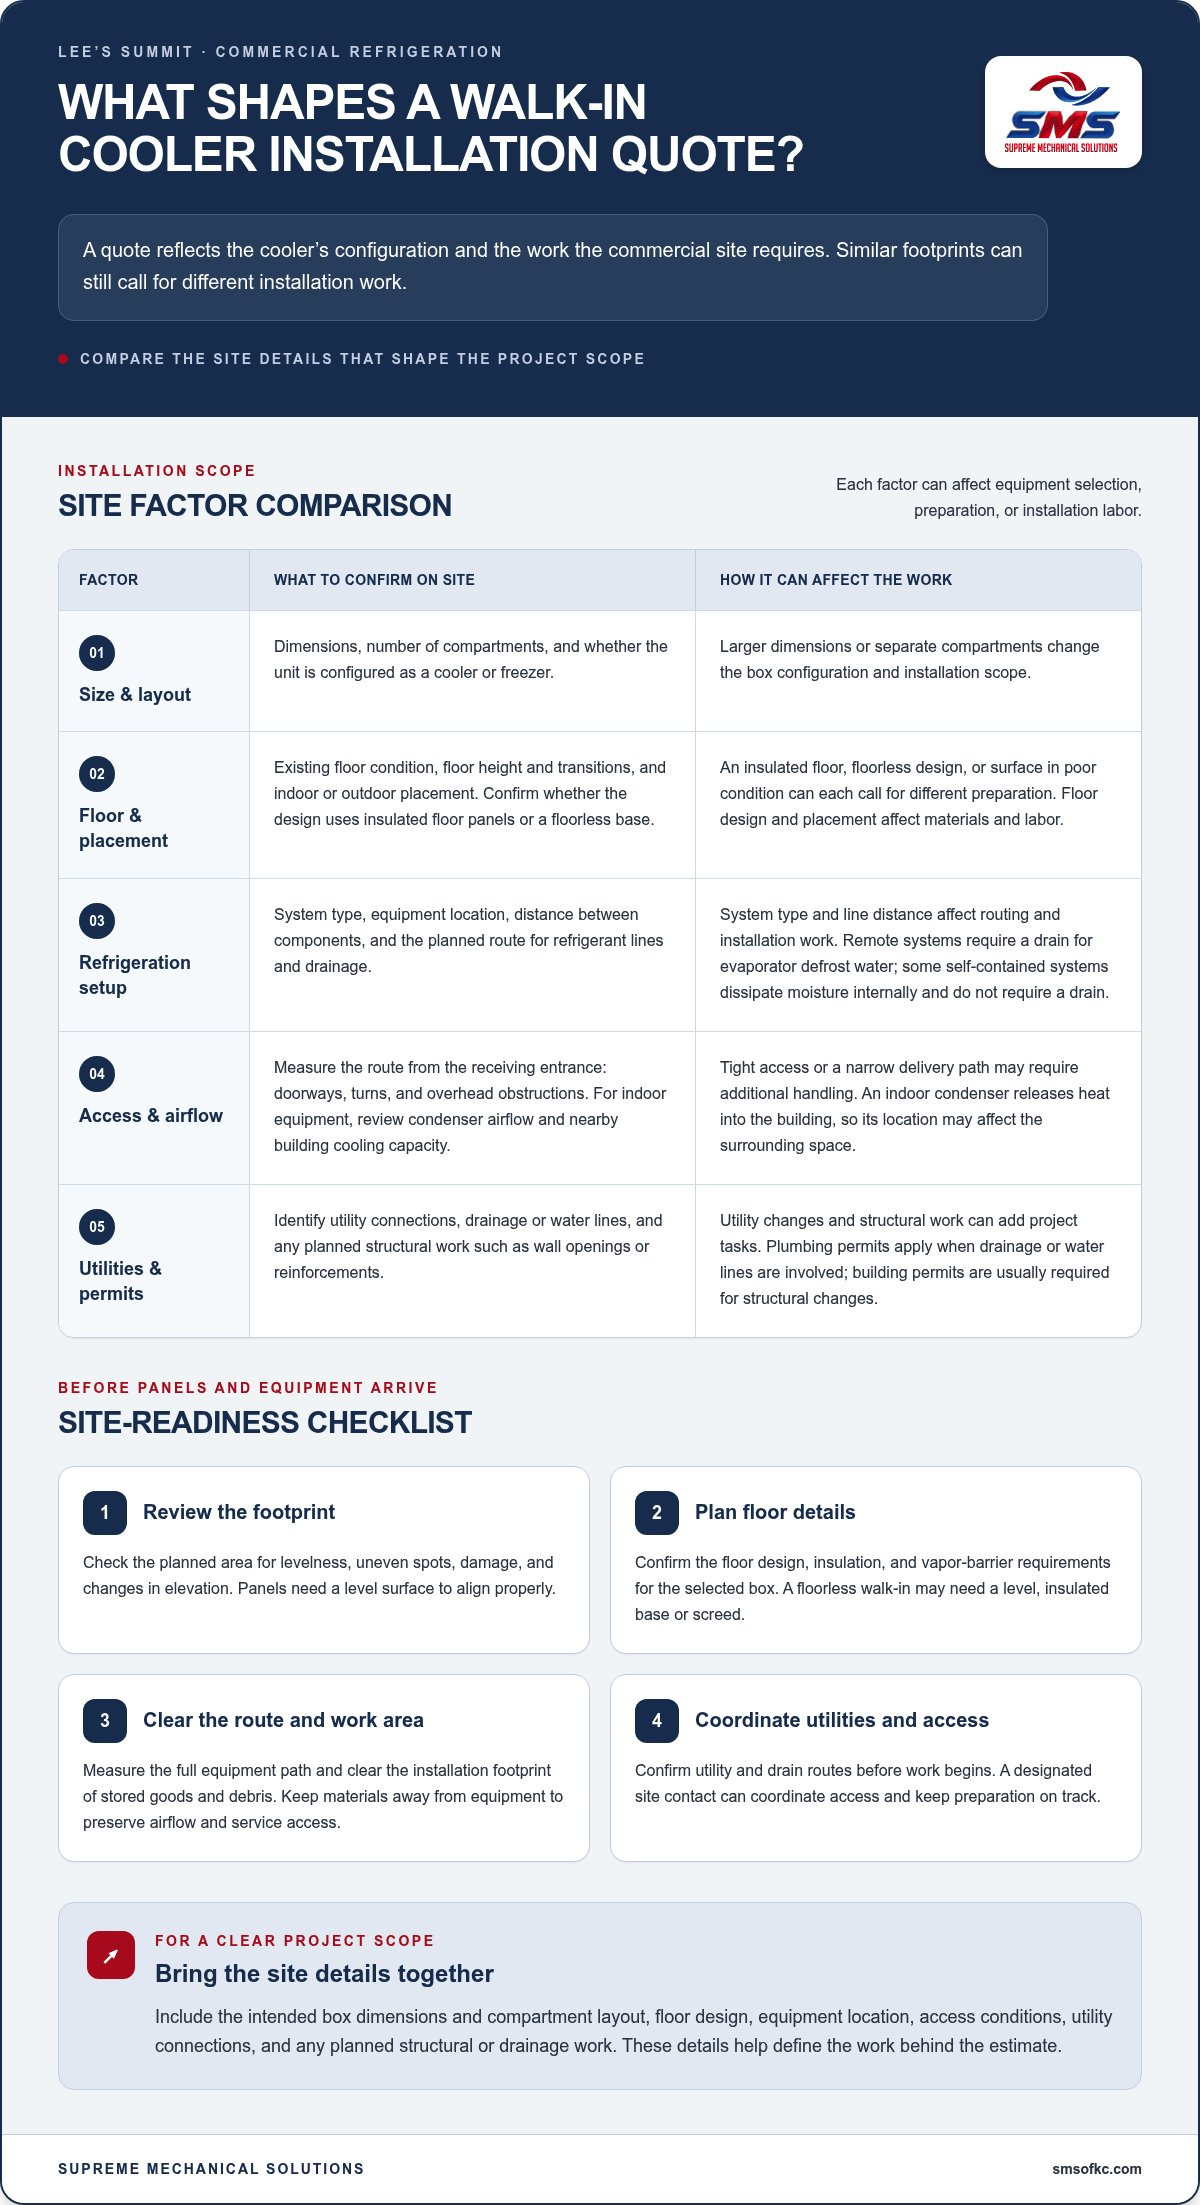
A walk-in cooler quote reflects the equipment configuration and work needed at the commercial site. Two units with similar footprints can require different installation work if their refrigeration systems, locations, or utility connections differ. For walk-in cooler installation in Lee’s Summit, the site layout helps define the scope behind the estimate.
Installation cost depends on the project and is provided after a quote request. Key cost factors include box dimensions, compartment count, cooler or freezer configuration, floor type, indoor or outdoor placement, refrigeration type, line distance, site access, utilities, and permit requirements. Each factor affects equipment selection, preparation, or installation labor.
- Size and layout: Larger dimensions or separate compartments change the box configuration and installation scope.
- Floor and placement: An insulated floor, floorless design, or outdoor location can require different preparation.
- Refrigeration setup: System type and the distance between components affect line routing and installation work.
- Site conditions: Tight access, utility changes, and structural work can add project tasks.
For example, a cooler inside a restaurant may have a shorter line route than one located farther from its refrigeration equipment. A narrow delivery path may also require additional handling. These differences make the actual layout and access route important parts of the estimate, not minor details.
Floor type affects more than the box footprint. An insulated floor panel, a floorless installation, or an existing surface in poor condition can each require different preparation. The selected design also determines how the enclosure meets adjacent floors. These details affect materials and labor, so include them in the project scope before work begins.
Utility and permit requirements can shape the scope too. Plumbing permits are needed when installation involves drainage or water lines. Building permits are usually required for structural changes, such as cutting into walls or adding reinforcements. Requirements depend on the planned work, so include them in the project scope and schedule.
Refrigeration equipment placement can affect nearby heating and cooling systems. An indoor condenser releases heat into the building, so its location may influence the surrounding space. A remote setup can require longer refrigerant lines and a drain for evaporator defrost water. Include equipment position and line distance in the site plan for walk-in cooler installation in Lee’s Summit.
Some cooler manufacturers require professional installation for warranty coverage. Include that requirement when comparing project scopes. For a clear estimate, organize the intended box dimensions, compartment layout, floor design, location, access conditions, utility connections, and planned structural or drainage work. A detailed scope shows how each decision affects installation cost without relying on a generic price range.
Transparent pricing and service
A useful installation quote explains the work, equipment, and site assumptions behind the total. For a Lee’s Summit restaurant, the scope should distinguish the cooler package from site preparation, refrigeration connections, drainage, and structural work. That breakdown helps managers compare proposals by scope, not just by headline price.
Before choosing an installer, review the written scope, equipment configuration, floor plan, line routing, utility work, and permit responsibilities. Check that the proposal reflects actual site conditions, such as a narrow delivery route or remote equipment location. Clarify who coordinates each task, including work assigned to other trades.
Ask for itemized descriptions rather than a single unexplained figure. A clear proposal can identify:
- The cooler or freezer configuration and compartment layout.
- Floor, insulation, and vapor barrier work included in the scope.
- Refrigeration equipment placement and line distance assumptions.
- Drainage, water lines, or structural changes included or excluded.
- Permit-related tasks and responsibility for coordination.
- Startup and the condition expected at project handoff.
These details make revisions easier to understand. For example, adding a compartment or changing the equipment location can affect materials and labor. If a site visit reveals a longer line route than the proposal assumed, the installer can explain the revised scope and its effect before proceeding. That gives facility managers and franchise operators a practical record of project decisions.
Warranties depend on the equipment manufacturer and its terms. Some manufacturers require professional installation for warranty coverage. Ask how the installation will be documented and which warranty terms apply to the selected equipment. Keep the proposal, equipment documentation, and completed work records together for future reference.
Discuss maintenance as part of the service plan. Commercial refrigeration maintenance can include cleaning condenser coils and checking refrigerant levels. Ask what work is included, how often visits are scheduled, and which tasks are separate. A clear description helps operators plan upkeep around kitchen schedules and equipment use.
If your business has multiple refrigeration units, request a scope that identifies each unit and its work separately. This makes it easier to distinguish installation tasks from service for existing equipment. It also helps managers track work that supports cooling performance and work that affects other building systems, including heating near an indoor condenser.
Review the handoff process before approving the proposal. Confirm how the installer will communicate schedule changes, document completed work, and explain system operation to the site team. A specific scope, stated assumptions, and clear responsibility for each task make the project easier to manage during installation.
Clarify how refrigeration and electrical work will be coordinated. Walk-in refrigeration installation includes setting the condensing unit and evaporator, running lines and a drain, and connecting electrical service through licensed trades as local code requires. The proposal can identify which trade handles each connection and where responsibilities begin and end. Confirm that the work matches the planned equipment locations and site conditions, and ask for exclusions to be written down. This gives managers a clear basis for reviewing the scope before authorizing work.
Food safety and equipment reliability
For a restaurant, stable refrigeration supports safe food storage and daily service. Assign a staff member to monitor cooler condition, record temperature readings, and report changes promptly. Use the equipment’s operating guidance to assess readings, rather than relying on a single observation. A log can help identify a pattern, such as temperatures shifting after frequent deliveries or a door left open during restocking.
Watch for signs of a refrigeration problem, including inconsistent temperatures, unusual noises, ice buildup, or rising energy bills. A freezer may also show frost accumulation, leaks, unusual odors, or compressor issues. Record when a symptom starts and where it appears. For example, noting ice near a door may help identify a seal or alignment issue.
Ice buildup can have several causes. Gaps between walk-in panels, a misaligned door, a door held open, or inefficient refrigeration equipment may contribute. Inspect visible panel joints and confirm the door closes fully after deliveries. If ice returns after clearing, document where it forms and how often. That information gives service personnel a clearer starting point for diagnosis.
- Track temperature readings and note unusual changes.
- Record noises, leaks, odors, frost, or visible ice.
- Check that doors close and are not held open during stocking.
- Keep a record of service visits and completed maintenance.
Routine maintenance can help identify minor refrigeration issues before they develop into costly repairs. Commercial refrigeration maintenance can include cleaning condenser coils and checking refrigerant levels. Dust and debris on cooling components can hinder efficiency and increase energy consumption. Consistent maintenance records give managers a practical view of equipment condition and recurring concerns.
Coil cleaning matters because condenser surfaces need to release heat during operation. When dust accumulates, the system may work less efficiently. Staff can keep the area around refrigeration equipment clear and report visible buildup, while scheduled maintenance addresses cleaning and system checks. This supports proper operation without treating one cleaning task as a substitute for examining the full system.
Food-service establishments may need health department certification to meet health and safety requirements. Operators should maintain relevant records and follow the requirements that apply to their establishment. A commercial refrigeration team can work with site staff by addressing equipment condition, maintenance findings, and recurring symptoms. Clear notes about temperature changes, door alignment, and ice locations help focus the work.
Respond to warning signs early. If a cooler develops inconsistent temperatures alongside new noise, or a freezer shows recurring frost and leaks, document the symptoms and arrange an assessment. Connecting observations with service records helps staff make informed decisions and keep refrigeration systems ready for daily operations. For kitchen ventilation concerns, restaurant exhaust fan repair in Kansas City can help address symptoms such as unusual noise or weak airflow.
Installation process
Indoor and outdoor installations differ mainly in equipment placement, line routing, and building conditions. Indoors, account for condenser heat and the building’s HVAC capacity. Outdoors, plan for equipment access and the route into the cooler.
Electrical and Plumbing Requirements
A walk-in cooler needs a dedicated power source that can handle its energy requirements. Electrical permits are required for wiring and connecting refrigeration and lighting systems, and a certified electrician should complete the wiring. Coordinate this work with refrigeration installation so the power connections match the selected equipment.
Drainage depends on the refrigeration setup. A remote system needs a drain for evaporator defrost water, while some self-contained systems dissipate moisture internally. Plumbing permits are needed when installation involves drainage or water lines. Identify the drain route and electrical scope before work starts.
Installation moves from site preparation to setting the box and refrigeration components. Installers assemble the panels, set the condensing unit and evaporator, run refrigeration lines, and arrange drainage where required. Licensed trades handle electrical connections as local code requires. The sequence depends on the equipment design and site preparation.
Indoor placement also affects surrounding building conditions. A condenser releases heat, so consider the HVAC system when choosing the cooler location. Equipment position and line distance can shape routing and service access. For an outdoor installation, plan how installers will reach the equipment and move components to their final location.
Installation Timeline
A standard walk-in cooler installation typically takes 1-3 days. A custom-built cooler may take 1-2 weeks, depending on complexity. The work involved, site access, equipment configuration, and readiness of utilities all affect the schedule.
Before installation, clear the work area and coordinate access for equipment and materials. Keep the planned route open and coordinate any required electrical or plumbing work. These steps can reduce interruptions during panel assembly, refrigeration connections, and startup.
Startup includes bringing the box down to temperature before installers leave the site. This gives the team a chance to confirm the system is operating and review its condition at handoff. Keep the surrounding area accessible during startup, and decide who will receive operating instructions and project records.
The U.S. Environmental Protection Agency states that walk-in installations should comply with applicable state and local building codes and standards. For Lee’s Summit businesses, plan permits and trade connections as part of the project, not as an afterthought. A clear sequence helps operators coordinate site preparation, installation, and startup with fewer conflicts.
Secure permits required by local regulations and building codes before installing a walk-in cooler. For an indoor installation, consider whether the HVAC system can manage heat from the cooler’s condenser. A certified electrician should install the wiring to meet code and support the cooler’s operating requirements.
Supreme Mechanical Solutions: Air Conditioning
Supreme Mechanical Solutions helps commercial operators address air conditioning needs alongside walk-in cooler planning. An indoor condenser releases heat into the building, which may affect the surrounding space and existing cooling load.
For restaurants, warehouses, and other commercial buildings, Supreme Mechanical Solutions provides air conditioning, rooftop units, split systems, and mini split systems. The right system depends on the building and its operating needs. Considering HVAC alongside refrigeration helps facility managers plan for the space as a whole.
Plan the Next Step for Your Commercial Space
Frequently Asked Questions
Which contractors install walk-in coolers in Lee’s Summit, Missouri?
Supreme Mechanical Solutions installs commercial walk-in coolers in Lee’s Summit. Its Kansas City metro service area includes Kansas City, Overland Park, Olathe, Lenexa, Shawnee, Leawood, Independence, Blue Springs, Liberty, Gladstone, Grandview, Belton, Raymore, and Louisburg. Restaurant owners, facility managers, and other commercial operators can contact the company about a project. Share the building’s location and intended use to start with the right site context.
What is the cost to install a walk-in cooler in Lee’s Summit?
Installation pricing depends on the project and is provided after a quote request. To support useful budgeting, describe how the cooler will serve your operation, such as storing prepared ingredients or receiving deliveries. Note site constraints that could affect the work, including operating hours or areas that need to remain accessible. A clear request gives the installer context to prepare project-specific pricing instead of relying on a generic figure.
What factors affect walk-in cooler installation prices?
Installation pricing reflects the selected equipment and the labor needed to complete the project. Intended storage use can affect cooler size and layout, while delivery access and the building’s operating schedule can shape coordination. For example, a restaurant installing a cooler near an active service area may need to plan how staff and installers will share access. Include these operating details when requesting a quote.
Do walk-in cooler installers in Lee’s Summit offer free estimates?
Don’t assume an estimate is free; request project pricing and review any estimate terms before approving work. A quote request should describe the commercial site, the intended cooler use, and the project scope. Ask for the proposed work and any charges to be presented clearly before authorizing installation. This gives restaurant or facility managers a documented basis for budgeting and approval without relying on an assumed estimate policy.
What types and sizes of walk-in coolers are available for commercial businesses?
Commercial walk-ins can be configured as coolers or freezers, with dimensions and compartment counts chosen to suit storage needs and available space.


